In the past couple of months, we have experienced major changes caused by the COVID-19 crisis.
The social distancing and the urge to stay home initiatives have dramatically switched the purchasing habits of the people in the entire world.
Businesses are responding to this need by switching and heavily adopting online operations.
One of the easiest ways they are doing this is by using an e-commerce platform such as Shopify to do most of their inventory or order management and online shopping presence.
Our team is adjusting, too.
By listening to our user requests, we’ve made major developments focused especially on eCommerce automation.
So today, we’re launching a major update to our Verified Reviews app for Shopify, aimed at automating the collection and display of your product reviews based on AMP technology.
Social proof and building online trust have never been as important as now.
Satisfied and loyal customers are becoming a new channel to sell.
So why not double down on collecting it and displaying it on your Shopify store?
Continue reading to learn how the new updates in Verified reviews can help you automate your review collection process.
What’s new with Verified Reviews
We worked hard the past few months to design advanced functionalities and build the best reviews collection app for Shopify.
It works seamlessly, and once you install it, all the codes for the widgets are already in place. There is no coding required.
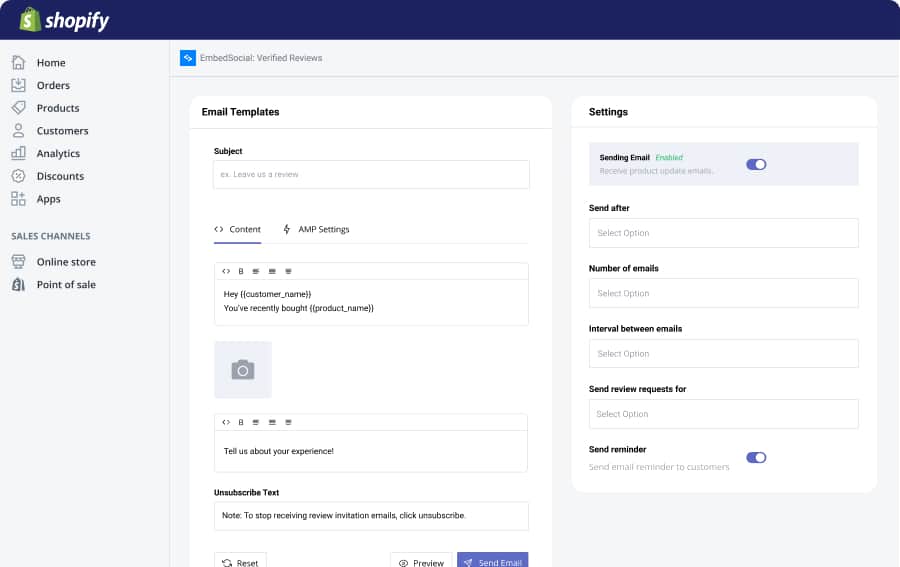
Additionally, we improved the overall onboarding of the app UI and included better options for setting and enabling the request emails:
Here are the major updates:
- Automatic setup of a schema code to display stars in Google results
- Option to upload photos in the review collect form
- New reviews widgets – table, slider, page, and grid layouts
- Option to replay to a review – send it via email and display it in the widget
- Last but not least, AMP collect form for Gmail
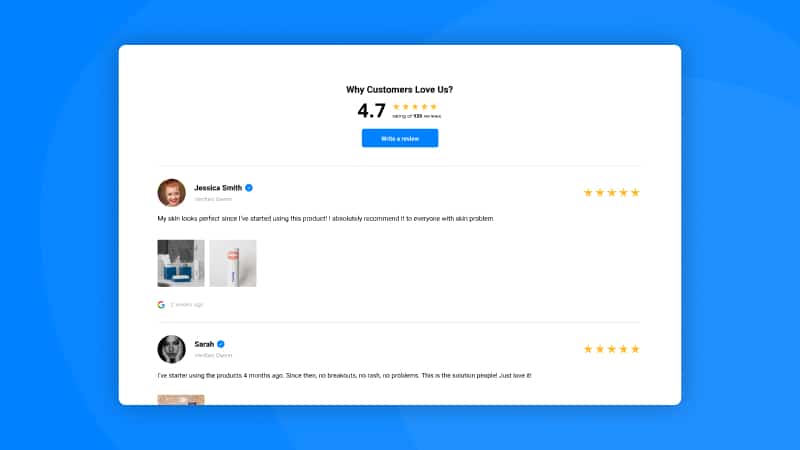
1. Schema aggregated rating for Shopify product pages
Once the app is installed, each product page gets a schema code that will display a star snippet in Google, improving SEO. All this works automatically, and there is no requirement for you to do any manual setup.
2. Receive reviews with multiple photos
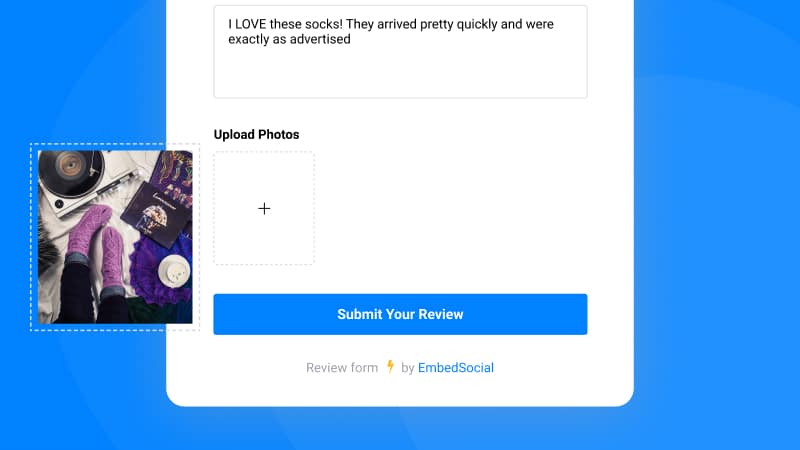
We’ve updated the collect form that will allow users to submit more than one photo alongside their testimonial.
All these photos will enrich visually the user-generated content displayed in your Shopify store.
This means that the widgets are equipped with new functionality that will display all the photos in a lightbox layout.
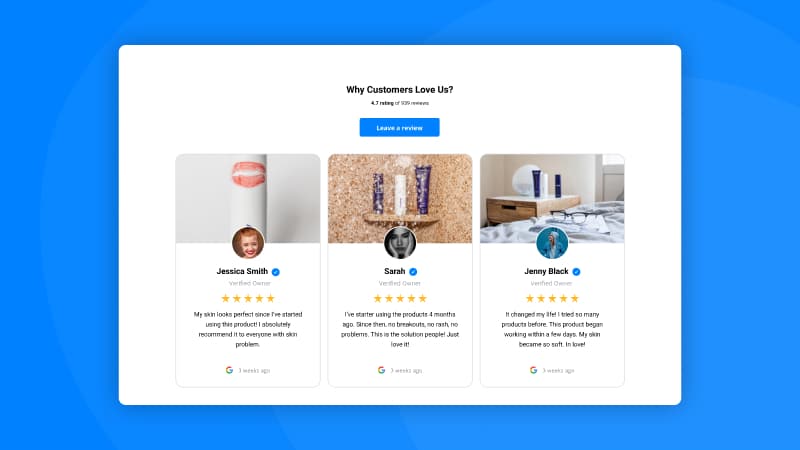
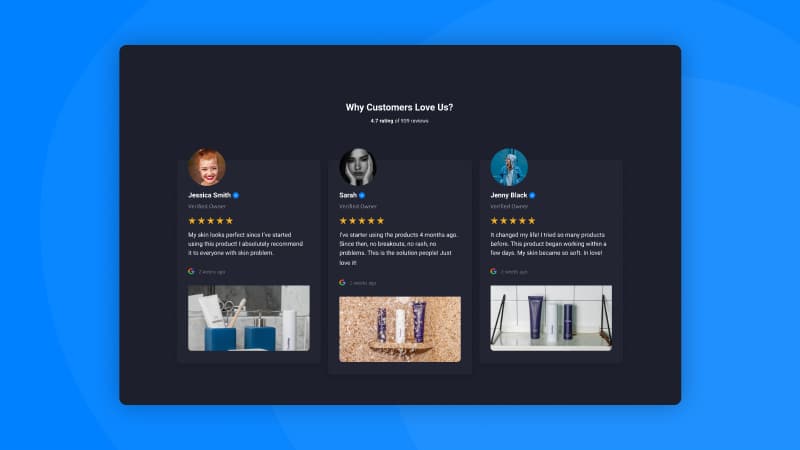
3. New reviews widgets for Shopify
The app has an entire front-end facelift.
All widgets are improved and provide all necessary information for displaying product reviews in modern, responsive, interactive layouts.
Shopify Table Reviews Widget
Shopify Carousel Reviews Widget
Reviews widget dark theme
Option to reply to a review
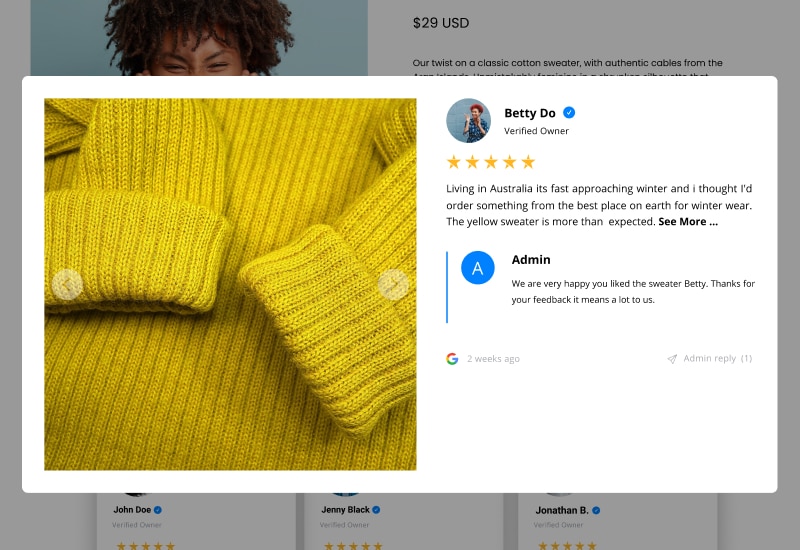
As a store owner, you can reply and display the reply for each review posted on your product page.
Additionally, once you reply the customer will receive an alert on their email for your reply, thus helping you build а greater relationship with your reviewers.
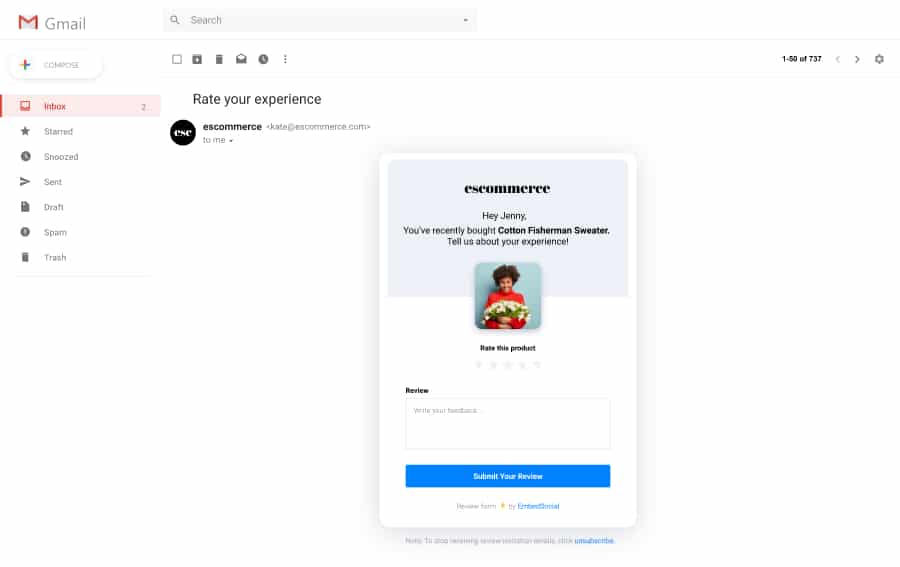
How the AMP email reviews collect form works
We can proudly state that Verified Reviews is the first app to use Google’s AMP technology to integrate the review collection process for Shopify stores.
Before going in more detail, let me briefly explain the Google AMP Technology.
AMP for Email allows senders to include AMP components inside rich engaging emails, that allow recipients of AMP emails to interact dynamically with content directly in the message.
Due to the novelty of the AMP technology, Google requires developers to be whitelisted before using and implementing it into their apps.
And we are happy to announce that our company has granted permission to use and develop on top of Google’s AMP components.
The result: An AMP email form that users can interact with directly inside their Gmail inbox. Here is what it looks like:
And here is the actual process of collecting reviews with EmbedSocial’s Verified Reviews app for Shopify
- Setup the email and it’s content
- Enable the AMP option
- Once a customer buys a product, they will receive a request email (based on the rules you’ve set up in settings)
- If this user uses a Gmail inbox, the email they will receive will be an AMP form
- Once they submit their review
- It will show in your Reviews section within the app
- If you auto-sync in with your widget, it will appear below your product information
For more details, check the ‘Getting Started’ instructions below.
Get started with AMP reviews emails for Shopify. It’s free.
The app is free for 200 orders per month. This means that you can start right now.
Follow the link below, and install the app.
For more details here are some helpful links:
- Verified Reviews widgets demo store
- Chat with us for any setup or pricing questions
I hope this major update will help you get the most out of your customer reviews and lead to increased trust and sales for your business.