Content creators and influencers have used a variety of tools and tactics to communicate with their audience. Yet, an influencer media kit is one of the most important tools for all of them.
Nonetheless, creating an influencer media kit that will earn you many collaborations can be overwhelming. Since this is a common obstacle for creators and influencers, we have prepared a guide for you to create a great media kit by using image editing tools and a link in bio tool.
A free social media kit template is also included that you can inspire from.
Download free social media kit >
What is an Influencer Media Kit?
An influencer media kit is a document that contains information about your work and identity as an influencer, which you can give to brands who are interested in collaborating with you. This document is the best way to present your style, work, and skills to brands.
Influencer Media Kit is not just one of the many social media content creator tools. It is a way to build relationships with brands by sharing details about your work. It also helps you stay organized and focused on what works best for you.
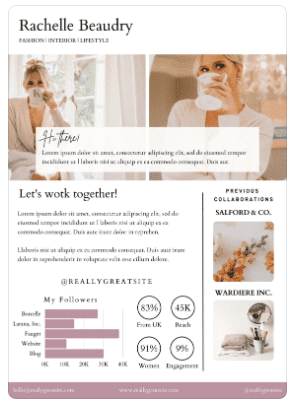
A well-organized media kit helps you keep track of the progress of each campaign and evaluate the effectiveness of your campaigns. They also help you find new opportunities with other brands who might be interested in working with you!
That being the case, your Influencer Media Kit should be organized and easy to understand. You can achieve that by dividing your media kit into a few sections: bio section, UGC portfolio section, pricing section, testimonials section, and demographics section, each of them with clear and real insights that will help you get the brand collaboration.
FYI: Link in BIo tool helps small business owners and UGC creators consolidate all their links in one platform and save tons of time and money on building link-in-bio pages and publishing blogs, newsletters, and social media posts.
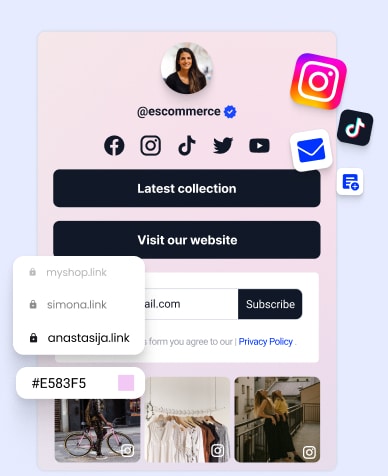
Convert followers to customers with the best link in bio tool on the planet.
Vibe code your new link in bio page in seconds and showcase your Instagram posts automatically.
Why do you need your own Influencer Media Kit?
If you’re an influencer, you should have one of these handy documents on hand at all times. And here’s why:
It gives you credibility and shows that you are a professional
A media kit is a document that gives you credibility as someone who can be trusted with the task of telling the story behind some product or brand. It shows that you are a professional and gives brands insight into your personal brand.
Thus, a well-designed media kit is an effective tool for attracting new clients and growing your business. It shows you are serious about working with brands.
It showcases your best work
Furthermore, a media kit is your chance to show off your best work and highlight why you’re the perfect partner for a brand. Make sure that every piece of content included in your kit is up-to-date and on its A-game.
It allows you to show off your experience
A good influencer media kit will give potential clients a clear idea of what kind of work you can do for them and why they should hire you. So, if someone wants to hire you for something specific, they can see what kind of experience you have in that field and fall back on it if needed.
It’s a good way to showcase your social media accounts
If someone is interested in what you have to say, they can easily see all of your most recent posts and followers on Facebook, Twitter, Instagram, etc., without having to go through each account separately. Therefore, make sure to include links so people can easily find your other social media accounts if they don’t know about them yet!
Brands can easily get in touch with you
It makes it easy for other bloggers or companies to contact you directly with questions or requests for collaborations or sponsorships without having to sift through each piece of content individually online or through email threads where things get lost easily over time.
What should you include in an influencer media kit?
Here is a list of all sections that your social media kit needs to include:
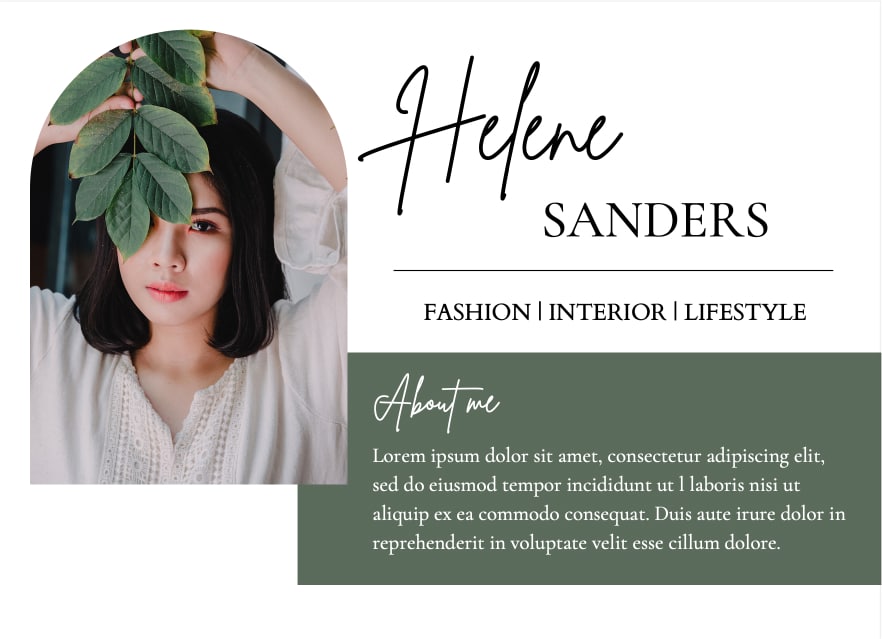
Short bio with photo
This section should include a concise and engaging bio that highlights your unique selling proposition as an influencer. It should reflect your personality, interests, and the value you bring to brands. Accompany your bio with a professional and high-quality photo that represents your personal brand.
Your active social media channels
List all your active social media channels where you have a significant presence. This gives brands an idea of where their influence lies and where their potential exposure would be maximized.
Follower count
Your follower count is a key metric that brands look at when considering collaborations. It’s a reflection of your reach and the potential audience that brands can tap into. Be sure to update this regularly to reflect your current standing.
Audience demographics
This section should detail the demographics of your audience, including age, gender, location, and interests. This information is crucial for brands to understand if their audience aligns with their target market.
Engagement rates
Beyond just follower count, brands are interested in how engaged your audience is. Include metrics like likes, shares, comments, and views to demonstrate the level of interaction on your posts.
Your website or blog
If you have a website or blog, include it in your media kit. This can showcase more of your work and your writing style and give a more comprehensive view of your online presence.
Past collaborations
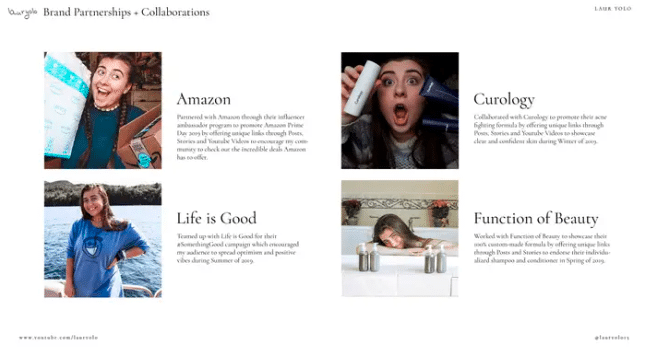
Highlight your past collaborations with brands. This shows your experience and gives potential collaborators an idea of what a partnership with you might look like.
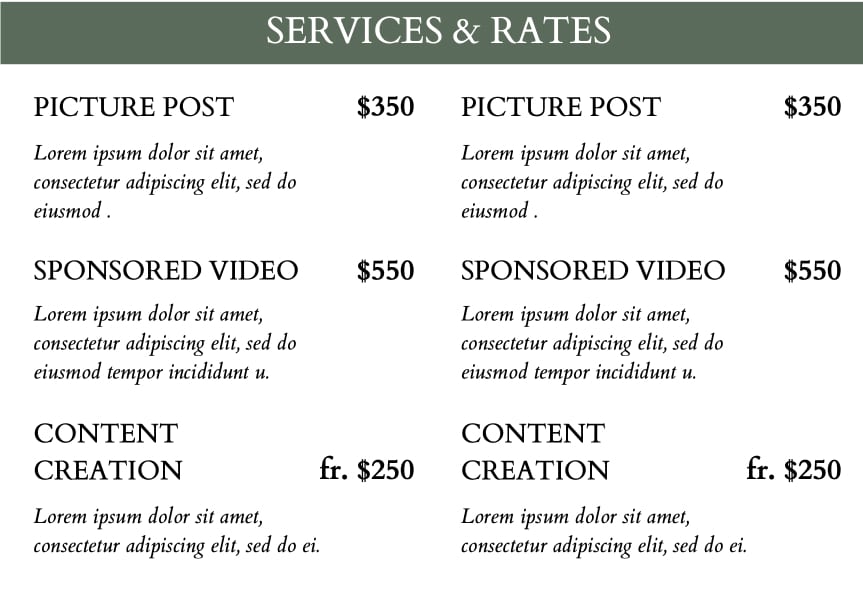
Services and pricing list
Provide a clear understanding of your services with short descriptions and a price for each service you offer.
Testimonials
If you have customer testimonials from previous collaborators, include them in your kit. This adds credibility and gives potential brands confidence in your work.
To collect testimonials, you can use a free leave-a-review form by EmbedReviews or upgrade to use more advanced reviews management software that provides auto sync with Facebook page or Google reviews.
Tips on How to Create an Influencer Media Kit
Think of your Social Media Kit as a visual resume. Nobody can see how great you are if you write an email saying you are the best influencer for their brand. On the other hand, if you send them a media kit that looks really good, you already have the advantage of getting the collaboration.
Therefore, keep reading and learn how to create all of the 5 crucial sections of your influencer media kit.
Tips for the bio section
The Bio Section is the first thing brands will see from your Influencer Media Kit. Hence, it is imperative to pay enough attention so you will make a great first impression. The goal of this section is to promote and sell yourself as an Influencer in the best way possible. Thus, you need to include a summary page about who you are. Also, include statistics to show the influence you have on other people.
A summary page
A summary page should be the first page of your Influencer Media Kit. Don’t waste brands’ time by starting just with your photo and name. Instead, together with the picture of you and your name, briefly explain what you do and who you are. Also, list all your relevant social media accounts.
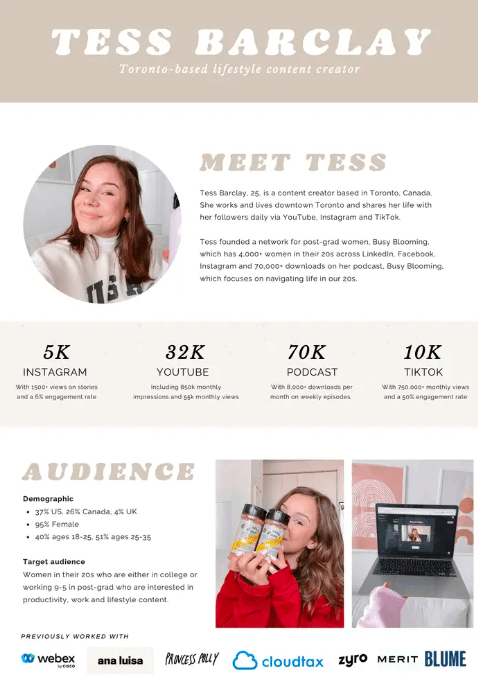
Statistics
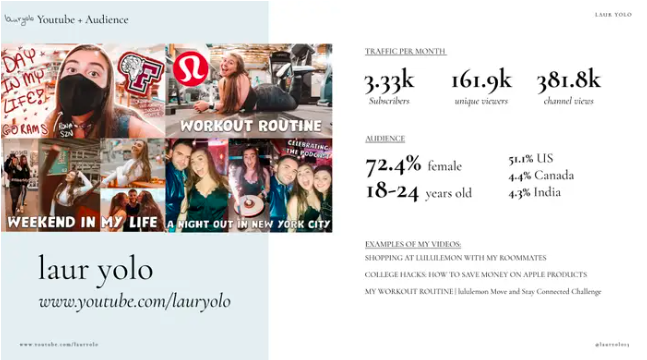
Let’s talk numbers! Make sure to include statistics from the channel you are focused on. For example, if your YouTube channel is your main account, showcase how many subscribers, views, and impressions you have. Also, include some monthly statistics (views per month and subscribers growth per month).
To gather all of that information, you can use YouTube analytics or Social Blade. Moreover, it’s a great advantage if you include some analytics screenshots so your content creator kit will be more trustworthy. Brands are probably going to check your statistics on Social Blade by themselves. Therefore, it’s a good advantage if you are the one to attach the statistics screenshots already.
The same statistics are needed for any other platform you use. Share some overall numbers, monthly statistics, and how frequently you post.
Tips for the Portfolio Section
Since this is your visual resume, you must include visual examples of your work. If you are a UGC creator, or for example, a TikTok video creator, you can insert your videos. If you are a blogger, for example, you can show some of your articles so decision-makers can see what topics you blog about.
In today’s digital world, it’s easy to share links to whatever type of content you need. Thus, leverage that opportunity and link every content format you are proud to show as an example.
Sample content is what brands need to see what you can do for them. There are no words that can explain your ideas as well as the actual samples of your best work.
Tips for the Pricing Section
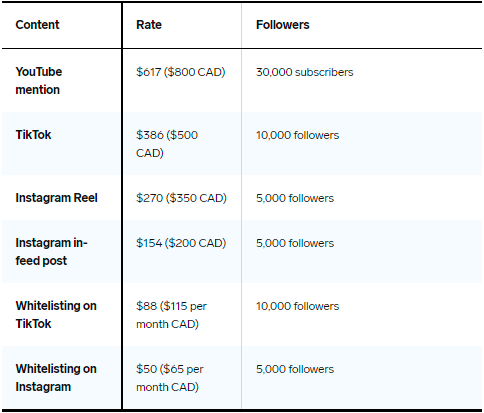
In the end, show what types of collaborations you offer and include the price for each one of your offers. When writing your prices, one tip to have in mind is to use different prices for different platforms.
Prices will vary depending on what you offer with different platforms. That way, brands can calculate their ROI (Return on investment) when they collaborate with you.
Pro tip: Always highlight whether your part of the collaboration includes any paid ads. Having this clear from the beginning of any collaboration will save you some trouble later. Therefore, brands won’t be able to insist on boosting your posts from your own pocket. This way you clearly say that if any paid advertising is needed, it will be paid by the brand, not by the influencer.
Tips for the Testimonial Section
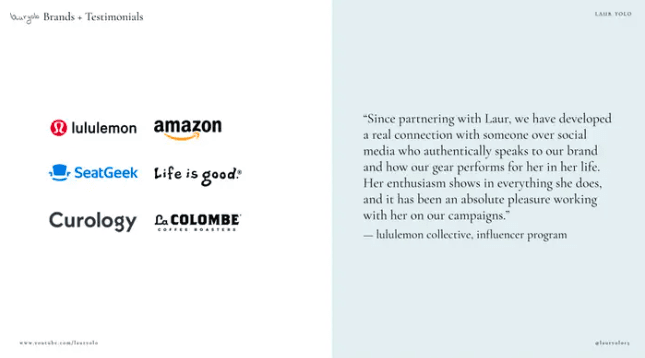
Testimonials are super important because they give people the confidence to want to work with you. In this section, you can include testimonials from brands you already had collaborations with. You can even include something that you got as feedback from your target audience.
For example, if some of your followers send you a message they bought something based on your recommendation, that’s a powerful social proof you should definitely include in your media kit.
Such testimonials for brands and followers show that a brand can truly have positive results from your collaboration.
Tips for the Demographic Section
Don’t forget that brands don’t care who you are as an influencer. What they truly care for is your audience. Hence, to have a winning Influencer Media Kit, you need to present who your audience really is. Their interest in working with you is because they want to target your audience and convert them into their customers.
Again, if you work on more than one platform, you need to show audience insights separately because the demographic can’t be the same.
Apart from your profiles and channels, if you have relevant Facebook Groups, email lists, or a website, you need to include statistic screenshots from them as well. Share as much data as you can. Also, if you think some of the data needs further explanation feel free to include that too (ex. if you have an engagement rate higher than the average engagement rates for accounts your size, you can educate brands by highlighting the facts).
Influencer Media Kits Examples
The sections and tactics mentioned above are surely a must-have when creating an influencer media kit that will put your name on the map. Yet, media kits can’t be the same for everyone.
You need to create a media kit that will show your work in the best way. That means, instead of focusing on the rules only, you need to focus on what showcases your work the best way.
For some, it will be 2 simple pages influencer media kit, yet someone will have more than 10 pages long media kit. Both options will work great for different influencers. You can get inspired by the following 5 great different influencer media kit examples that prove there are a variety of media kit options that will work great.
How to Design an Influencer Media Kit
12 pages
The first example is a very detailed and aesthetic media kit with 12 pages. The media kit provides details about the work, statistics as well as visual examples of the work. This is a perfect example that you don’t need to limit yourself on how long a media kit should be, as long as the pieces of information it gives are useful.
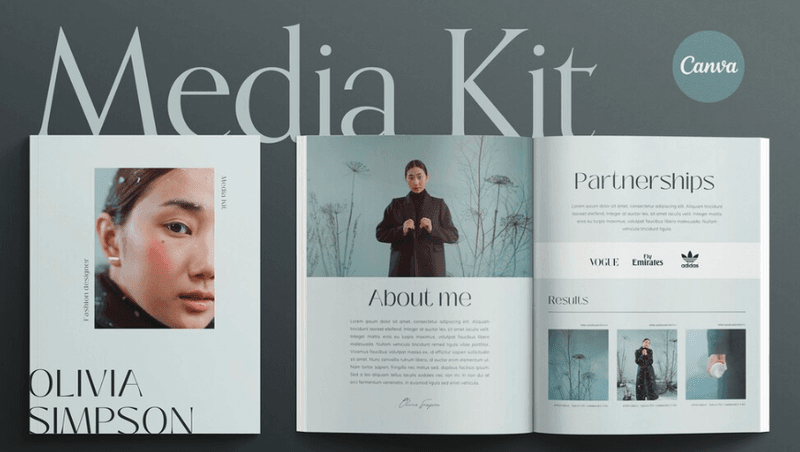
Since the media kit is 12 pages long, it’s not bad that it starts with a page with a picture of the influencer and name since it looks like the cover page of the portfolio. However, if your media kit is 3 pages long, having one whole only with a picture of you will not be the best decision to make.
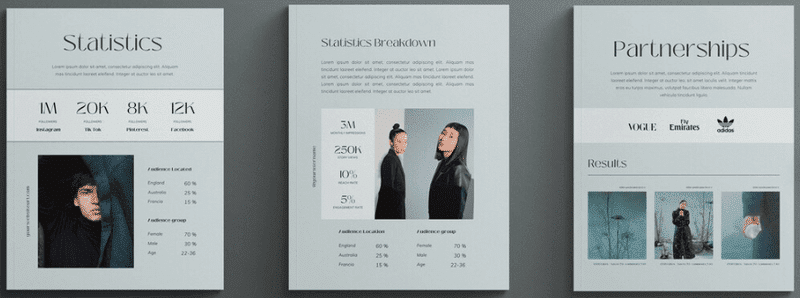
Statistics are clear and explained, so the person who is reading the media kit will easily understand your numbers. Also, it has a partnerships page that not only explains influencers’ previous work but it shows visual examples of how you’ve done your part.
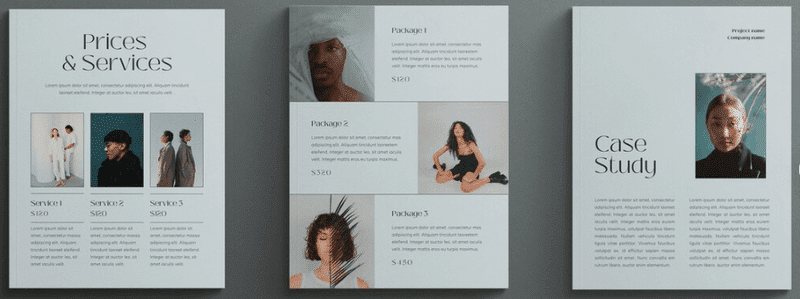
Lastly, it lists prices and the types of services the influencer can offer to brands. In this particular media kit, it’s great that the influencer briefly explains all kinds of services. Additionally, it has prepared packages so different kinds of brands can find a package that suits their needs best.
2 pages
It doesn’t mean that a shorter influencer media kit is less valuable than a long media kit. As long as a brand can see who you are as an influencer and what kind of work you can do for them, you will be fine.
For example, the following influencer media kit is only two pages long. The first page includes a short summary highlighting who the influencer is, what social media platforms she uses, and how many followers she has. Moreover, the demographics, other useful statistics, and brands she already worked with.
On the second page, she provides a couple of examples of her work, lists the services she offers, and also prices for each platform and service separately.
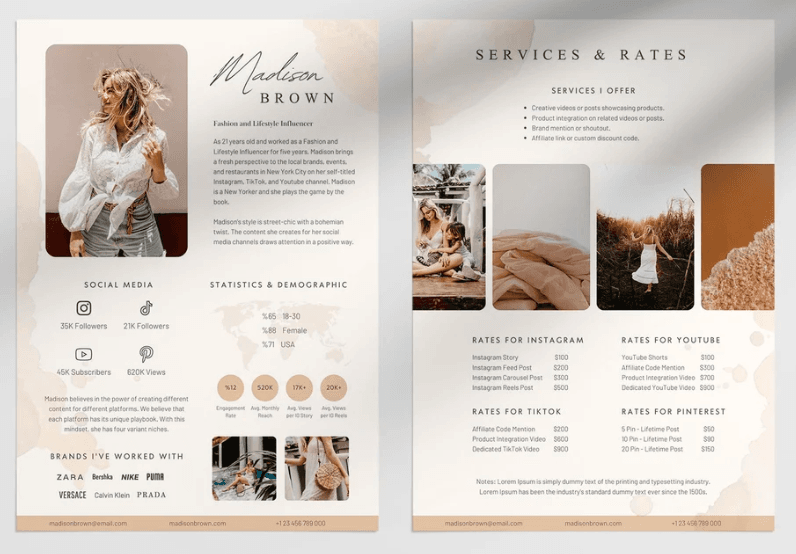
Although only two pages long, you can see that this media kit provides all the information brands need to know about the influencer. The one tip to successfully create this short media kit is to keep it clear and as simple as possible. That means don’t sugarcoat things but keep it as straightforward as possible, and you will be fine.
Single page
Having a one-page media kit doesn’t scream “experienced influencer” from the first thought. However, with good design, it can be enough space to present the most important things a brand needs to know to consider collaborating with you.
That’s the case with the influencer media kit below. It has a picture of the influencer, so it has a more personal touch. It also has a short bio, platforms she uses, and audience size and demographics. Furthermore, in this example, the biggest focus has the services and the prices the influencer offers.
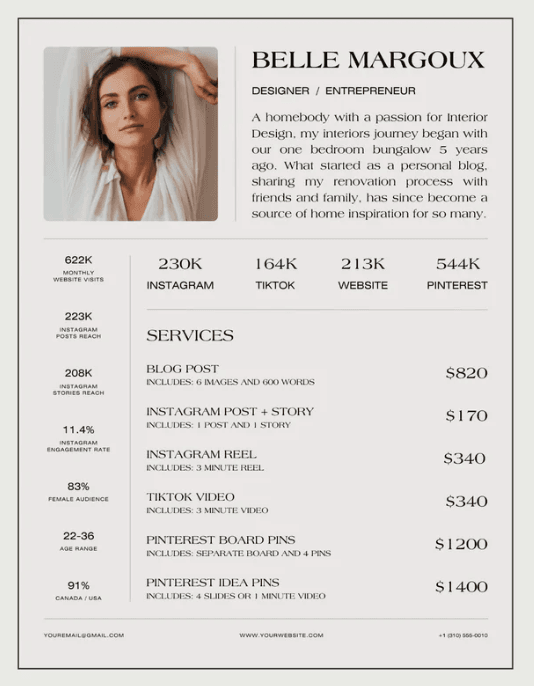
Many say that brands and agents appreciate simplicity, and that is true. Therefore, this is also a good example of an influencer media kit. Still, if a brand is interested in collaborating with you, they can reach you on the email at the bottom of the media kit. Also, if needed, they can ask you to send more information or a portfolio.
Yet, the one point of improvement for this media kit example is to insert your Instagram, TikTok, and Pinterest accounts. It doesn’t require a large space and can be very insightful for brands to discover your profiles.
Media kit for travel influencers
This is another great influencer media kit with a design that will work great for travel micro influencers. The example has a cover photo, an about section, and demographics on the first page. Yet, the design of the second page is what makes this media kit a great example for travel influencers.
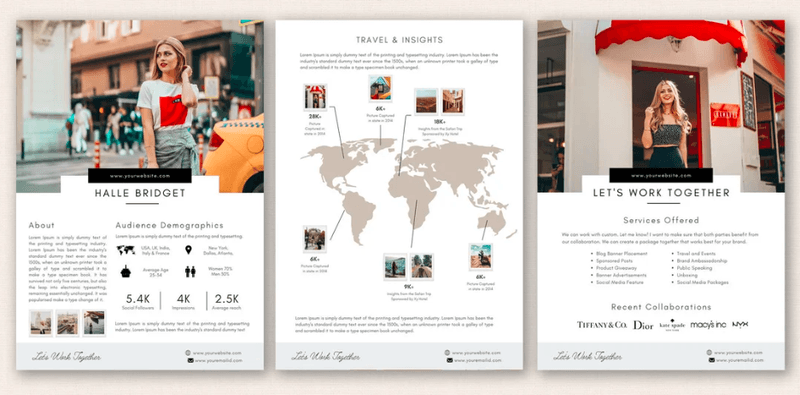
With a map showing where they have you already traveled, influencers can show that they have experience in creating content that is helpful and enticing for travelers. You can add text to the picture and explain more about your previous travel journey.
If some of your past trips were a part of some collaboration, explain your part of the work and how the company benefited from partnering up with you. Although the example above is only three pages long, if there is some very successful collaboration you are proud of, you can add another page to share the content you created as well as the results it brought to the company or the brand.
On the last page is a section with listed services but without written prices. Even though it is a good tactic to include prices, some believe that you are losing the power to negotiate if you list the prices. However, all brands are different and some prefer to see the prices before they contact you for further discussions.
YouTube media kit
Lastly, for influencers on YouTube, there are super helpful audience-planning tools that help influencers effectively peach themselves to brands; this tool is one of the best influencer marketing tools on the market right now. YouTube can help you create a shareable summary with all insights about your account that are required by advertisers and brands who want to collaborate with you.
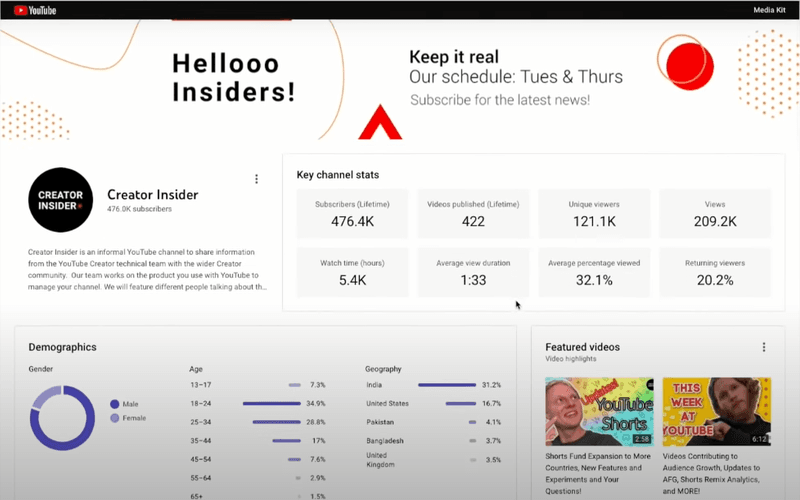
To create and download your YouTube media kit, you need to open your Monetization tab and click BrandConnect (if you are eligible to apply, you need to sign up and accept the terms of permission). Then, click View Media Kit.
When you open the media kit, all your channel data will be filled as in the picture above. Even though everything will be already summarized, the bio can be edited if you want to customize it your way.
This is one of the most helpful tools for YouTube creators. It is currently available only in the U.S., Canada, and the United Kingdom. However, it’s expected to soon be available in other countries as well.
How to Create an Influencer Media Kit (with Canva)
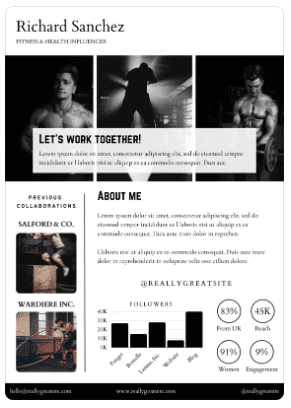
Luckily, to create an Influencer Media Kit, you don’t need special design skills because everybody can do it using Canva.
To get started you need to open Canva and search for “media kit” in the search box. An extensive pool of templates will show from the search results. You also have an option to create a blank media kit. The great part is that Canva’s library has media kit templates for every style, industry, and theme that are customizable.
You have access to millions of professional stock photos, images, icons, illustrations, and other graphics with which you can personalize your media kit to stand out.
Additionally, to add a personal touch, you can upload your own branding elements like a logo, and also upload your own images and statistics screenshots. To add elements to your design, you can use the drag-and-drop tool.
Feel free to experiment with colors, fonts, backgrounds, etc. Make an influencer media kit that matches your style and aesthetic. Remember, your influencer media kit should look like an extension of your website or social media accounts. However, the best advice is to keep it simple and elegant since simplicity and elegance go hand with most brands nowadays.
So, whatever style fits your personal brand, try not to overcomplicate things. The simpler something looks, the more likely it will be read by people who matter.
Another important thing is to be selective about what goes in your influencer media kit and not overload it with too many unnecessary details. To select what is necessary and what is not, ask yourself if that information is relevant and does it provide real value for potential clients.
In the end, save your media kit as a PDF or other preferable format and embed it on your website or share it directly with brands from Canva via email or your social media accounts.
How to create link in bio page for an Influencer Media Kit (with Feedlink)
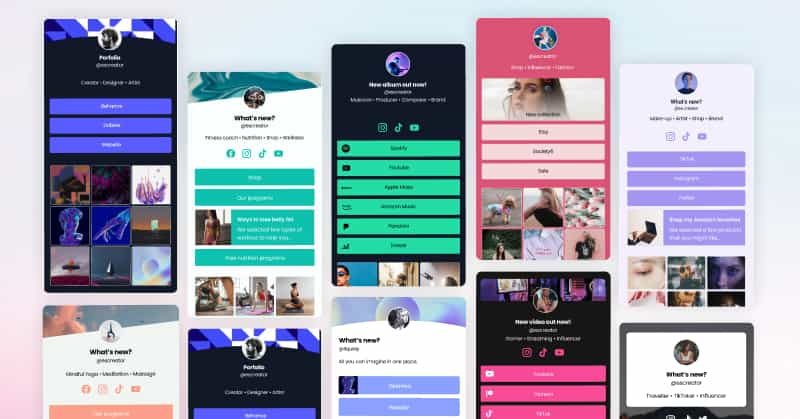
Canva is a great way to create a pdf or an image as an Influencer media kit.
But why not make it more dynamic?
This means creating a digital influencer media kit that will update automatically and become the home of all your online activities.
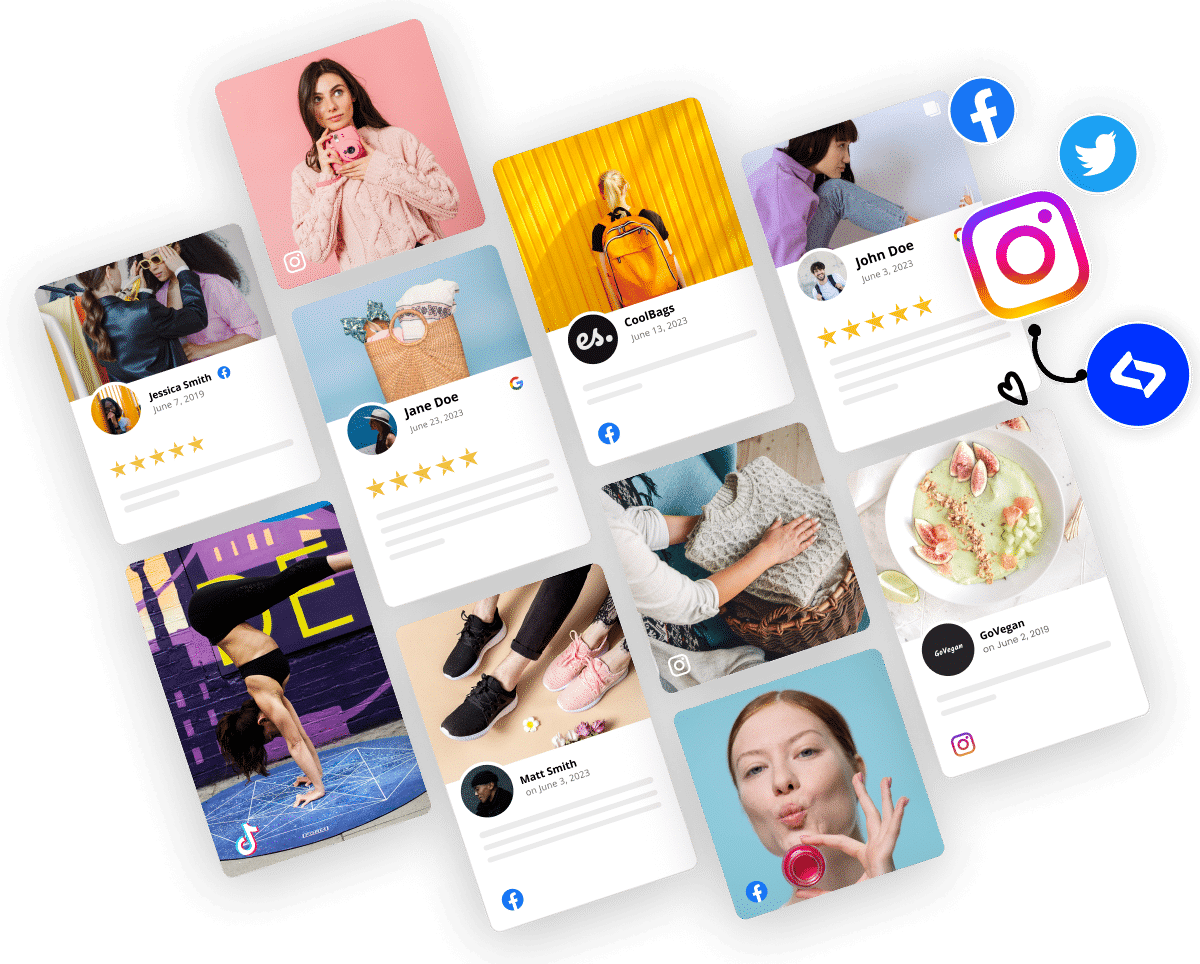
Check Feedlink – the complete link in bio creator that will enable you to automatically connect Instagram and TikTok and show all your influencer activities in one beautiful landing page.
To get started, every user can create a free Feedlink and upgrade at any time to claim their own .link domain.
And the best social media influencers can choose from the variety of pre-built influencer media kit templates and go live in just a few seconds.
No need for coding skills, no maintenance, and no hosting.
Connect your social media profiles, and you are ready to have your digital influencer media kit. We should also note that some of the top Instagram content creators are using FeedLink as their link in bio.
Takeaways
To sum up, the most important thing is to make sure that your influencer media kit looks professional. It should be easy to read and follow, with the information presented in a logical order.
You also need to add contact details in case potential collaborators have questions or want to get in touch. Furthermore, you can use the media kit for each campaign you work on and adapt it accordingly to create a new one for each project.
Lastly, now that you’ve got your super-awesome media kit, the next step is to promote it. You should be sending it out to any bloggers and websites that you want to work with.
This can help drive some business in the early stages of your campaign, as it will help people see what you’re working with and you can easily land one of the many user generated content jobs.
FYI: Link in BIo tool helps small business owners and UGC creators consolidate all their links in one platform and save tons of time and money on building link-in-bio pages and publishing blogs, newsletters, and social media posts.

Convert followers to customers with the best link in bio tool on the planet.
Vibe code your new link in bio page in seconds and showcase your Instagram posts automatically.
FAQ about Influencer Media Kit
An influencer media kit can be 2 pages long. However, it’s good to be more than 3 pages long and with as many insights as you can. Of course, this depends on how long the influencer has been working in the industry, and it doesn’t mean you should build a long media kit with irrelevant information.
However, if you follow the guide above and include all 5 sections together with screenshots and other visuals, your influencer media kit will be at least 5 pages long
A big difference between these two types of kits is who they’re aimed at.
A media kit is a collection of information about you and what you do. It’s used to describe you as an influencer so that brands can learn more about you before signing a collaboration with you.
On the other hand, a press kit is similar to a media kit, but it’s specifically designed for journalists and bloggers who might want to write about your brand. It should include all the basic details, as well as any information that could be relevant for a particular publication or blogger.
Sending your Influencer Media Kit is a straightforward process.
First, ensure that your kit is professional and includes all the necessary elements, such as your bio, social stats, demographics, previous collaborations, and contact details. Once your kit is ready, you can send it to brands and businesses via email.
It’s also beneficial to have a digital version of your kit available on your website or social media platforms for easy access.
Writing an Influencer Media Kit involves several steps. Start by writing a compelling bio that includes your name, location, mission statement, and a brief description of your work. Next, include your social stats, such as your follower numbers and engagement rates. Highlight your audience demographics to show potential brands who they will be reaching.
Mention your blog or website, and present examples of your previous collaborations and testimonials.
Don’t forget to include your pricing rates for your services and your contact details. Lastly, wrap everything up in a good design that aligns with your brand aesthetics.
Influencer Media Kits can significantly increase your brand’s reach by showcasing your value to potential collaborators. By presenting your social stats, audience demographics, and previous successful collaborations, brands can see the potential benefits of working with you.
Furthermore, by including your pricing rates, you make it easy for brands to understand what they will be getting for their investment. This transparency can lead to more collaborations, thus increasing your brand’s reach.

