A shoppable widget is a feed where the posts sell: each post carries product tags, and a visitor who clicks one lands on the product. You build it by tagging products onto the posts of any widget.
Tagging lives in the 'Links' tab of the widget's top menu. Shoppable widgets are available on every plan.
Before you start, you need products to tag. Add them one by one from this same panel, or import a whole catalog, see Product Catalogs.
How to tag products on your posts
Open the Links tab. In the widget editor, click 'Links' in the top menu. Every post gets an 'Add product or CTA' dropdown above it.
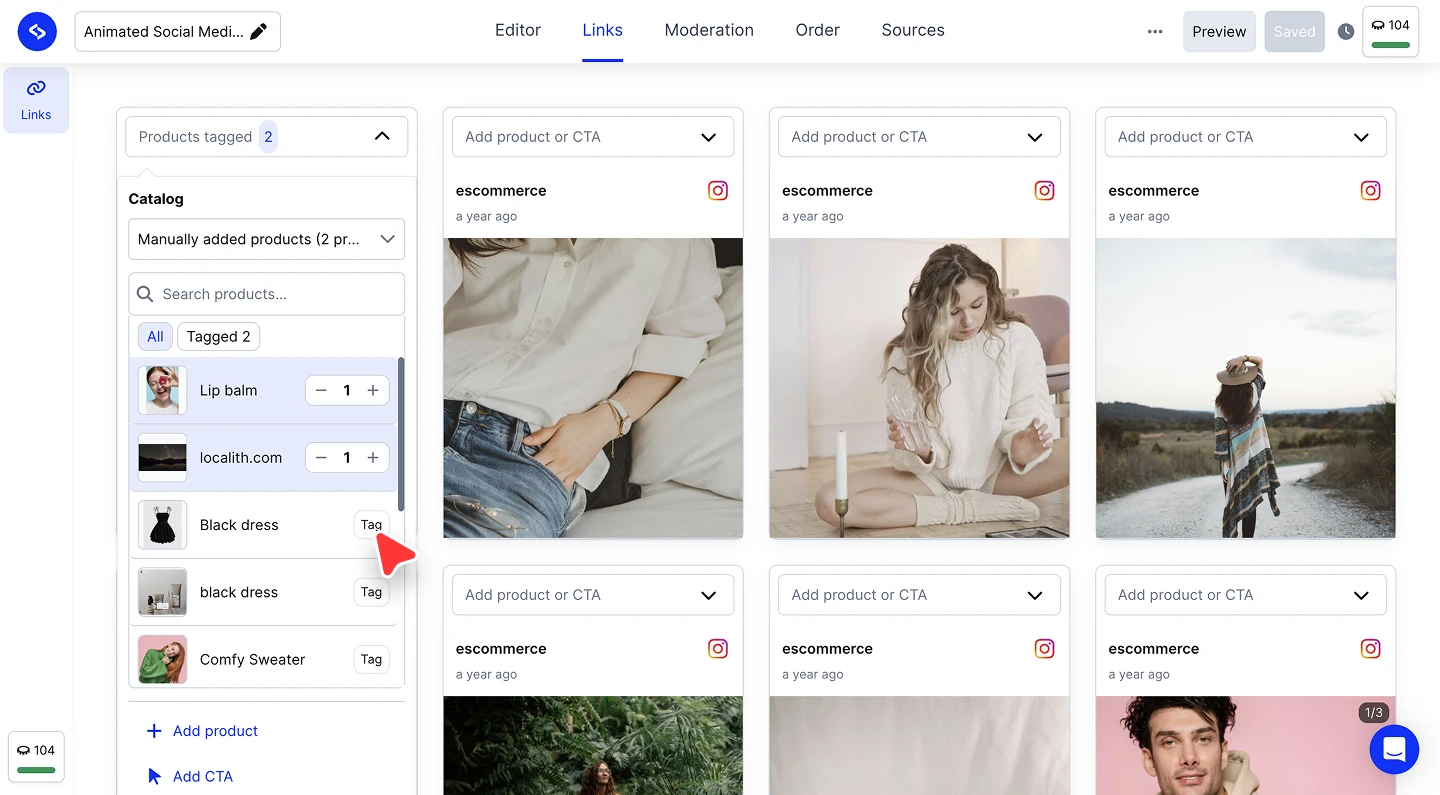
Pick the catalog. In the panel, choose which 'Catalog' to tag from, such as your imported catalog or 'Manually added products'.
Tag the products. Search or scroll the product list and click 'Tag' on each product shown in that post. The counter above the post tracks how many it carries.
Place the hot spot on the photo. Each tag appears as a shopping-bag icon on the image. Drag it onto the product itself, and hovering it shows the product name and price.
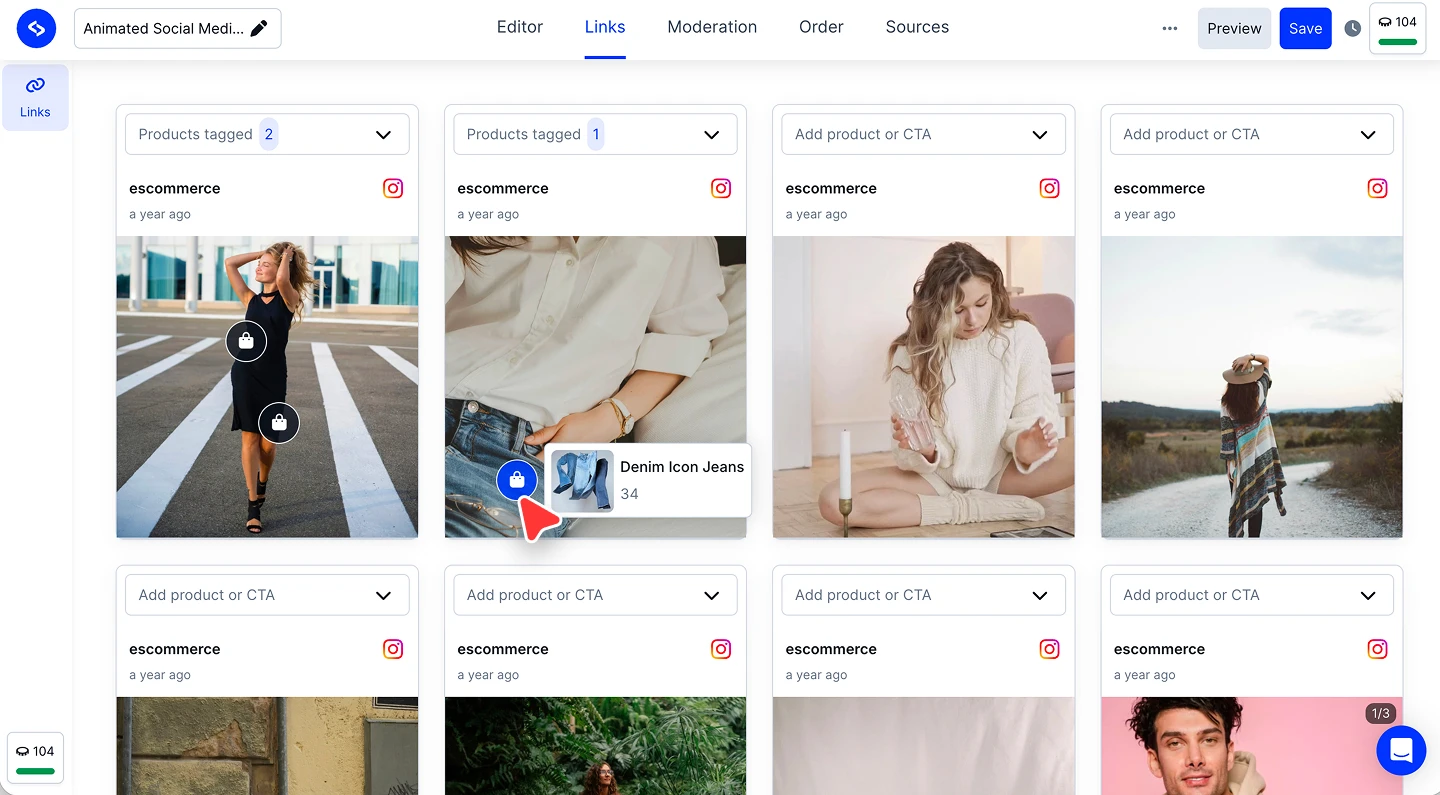
Save. Click 'Save' in the top right and the tags go live on your embedded widget.


A post can carry more than one tag. Tag every product visible in the photo and place each hot spot on its own item, so the lookbook shot sells the whole outfit.
Adding a CTA instead of a product
Not everything you want to link is a product. '+ Add CTA' at the bottom of the panel attaches a call-to-action link to the post instead, useful for a campaign page, a booking link, or a collection.

The CTA is a small button you define yourself: set the 'Link URL', write the 'Button text', and pick the 'Button color' and 'Text color' so it matches your brand, then click 'Save'.

New products can also be created without leaving the editor with '+ Add product', and 'Clear tagged products' removes every tag from the post in one click.
What visitors see
On your site, each tag is the shopping-bag hot spot on the photo. Hovering or tapping it expands the product's name and price with a 'Buy' button, and opening the post shows every tagged product listed beside it, each with its own 'Buy' button leading to the product.

Check it yourself before it goes live: click 'Preview' in the editor's top bar and open a tagged post.
Ready to make your feed sell?
FAQ
Which plan do I need for shoppable widgets?
Shoppable widgets are available on every plan. Importing a product catalog is available from the Pro plan.
Can one post carry several products?
Yes. Tag each product and drag each hot spot onto its own item in the photo.
Where do the products come from?
From your catalogs. Import one, or add products manually with '+ Add product' in the panel. See Product Catalogs.
Can I link something that is not a product?
Yes. Use '+ Add CTA' to attach a call-to-action link to the post instead of a product tag.
What do visitors see when they click a tag?
The product's name and price with a 'Buy' button, and the open post lists every product tagged on it. The Buy button leads to the product.
How do I remove the tags from a post?
Open the post's panel in the 'Links' tab and click 'Clear tagged products'.
Do I need to re-embed the widget after tagging?
No. Click 'Save' and the tags appear on the widget already embedded on your site.
What's next
With the posts tagged, keep the catalog itself in shape in Product Catalogs.
If you have any questions, click the bottom right chat icon to talk with our customer success team or send us an email at support@embedsocial.com We're here for you 🙏